
This is crossposted from S2Ki from here.
Install Process#
This is not a DIY guide, just sharing my experience/lessons learned installing Bride Zieg IV Wides on PCI slider rails. This is on a MY07 S2000.
I already had the PCI slider rails and originally wanted Recaro Pole Positions but never got around to buying them. Eventually Recaro was acquired and not it seems difficult if not impossible to find new seats from them. Since they aren’t fulfilling orders anymore, you can no longer buy them from places like Evasive Motorsport. Instead, I got a Zieg IV Wide (also FIA certified) as it seemed like a great substitute, and from another S2Ki post I knew they would fit somewhat.
I’m not super mechanically inclined so it probably took me longer than the average person (~1 day) and I did have to take it apart and put it back together many times when fitting the seat. Some important notes/learning:
- Since they are slider rails, you can slide them apart to put the nuts on the inside instead of trying to fish them through like I did initially.
- As seen in the instructions picture below, there are two sets of holes for each side on the base bracket. For the Zieg IV Wide, I recommend mounting the sliders to the holes on the left side for each side.
- If you try to do outer, the bolts that attach to the seat wont be long enough to catch the threads.
- If you try to do inner, it will allow for the threads to catch but then the mounts are too narrow acting like a V shape.
- If you try to do right, the mount sizing is perfect but when you install the seat, the right thigh bolster will rub against the trans tunnel making it not safe to install the rail to the floor. The rear right does not line up super well and the bolt will enter at an angle.
- If you do the left, the mount sizing is perfect and you can install the rails to the floor. However, the left shoulder bolster does rub with plastic/leader trim (just above where the gas cap release is). Because of this, you have two options:
- Fit the seat such that the shoulder bolster is in-front of the plastic trim. This will move the seat closer to the steering wheel, and since I am shorter (5'10") I chose this option. If you go this route, you will face problems installing the front bolts as the slider is in a forward position. What I did was thread the first two bolts through and get them low enough to slide the rails over but high enough that you can lift the rear of the rail/seat. From there, I was able to insert the rear bolts, slide the seat all the way forward, and torque them down. I then slid the seat as far back as possible and tightened the fronts with a wrench.
- Fit the seat such that the shoulder bolster is behind the plastic trim. I’d recommend this for taller people (6’+). You wont get as much room to slide forward but it should fit better.
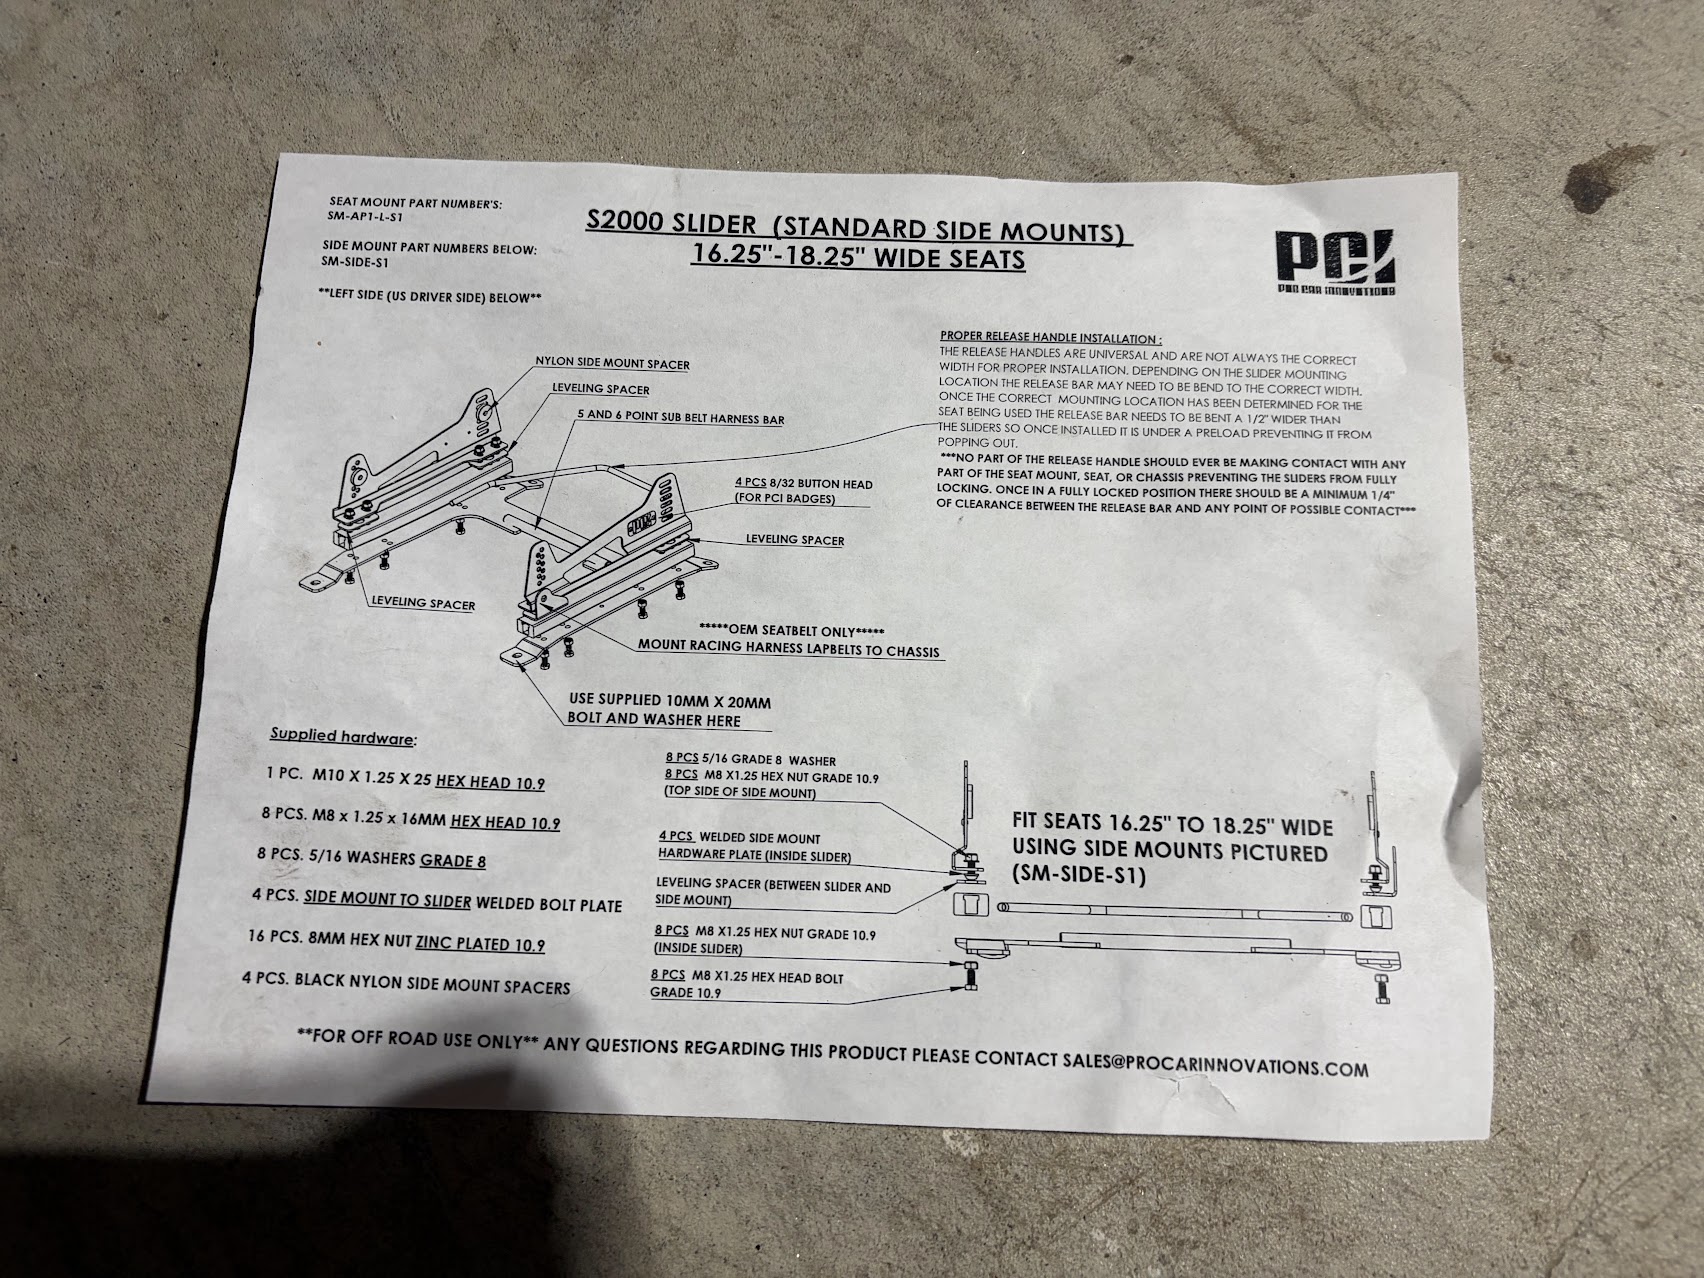
- The PCI rails come with plastic spacers that are supposed to prevent scratches on the seat. I did not install these as the Bride provided seat bolts would not catch threads at all when trying to install them. It may work if you buy longer bolts but I don’t really care as I am tracking this car.
- The pull up slider bar will NOT fit initially. I’ve seen some posts on S2Ki complaining about this, but this is by design (read instructions in picture). You can bend it by hand such that the prongs are facing outward then install it onto the sliders, no special tools required.
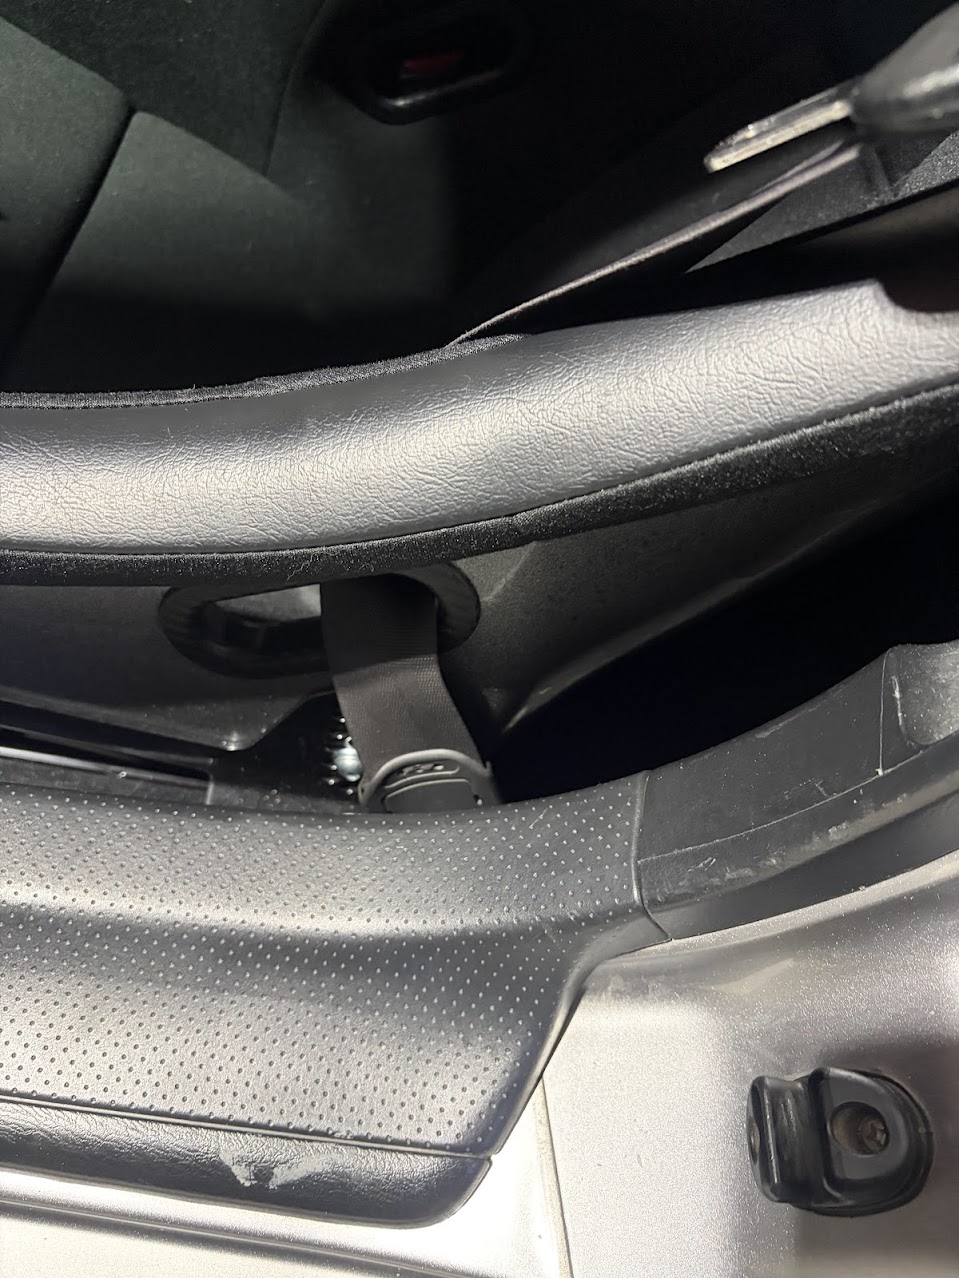
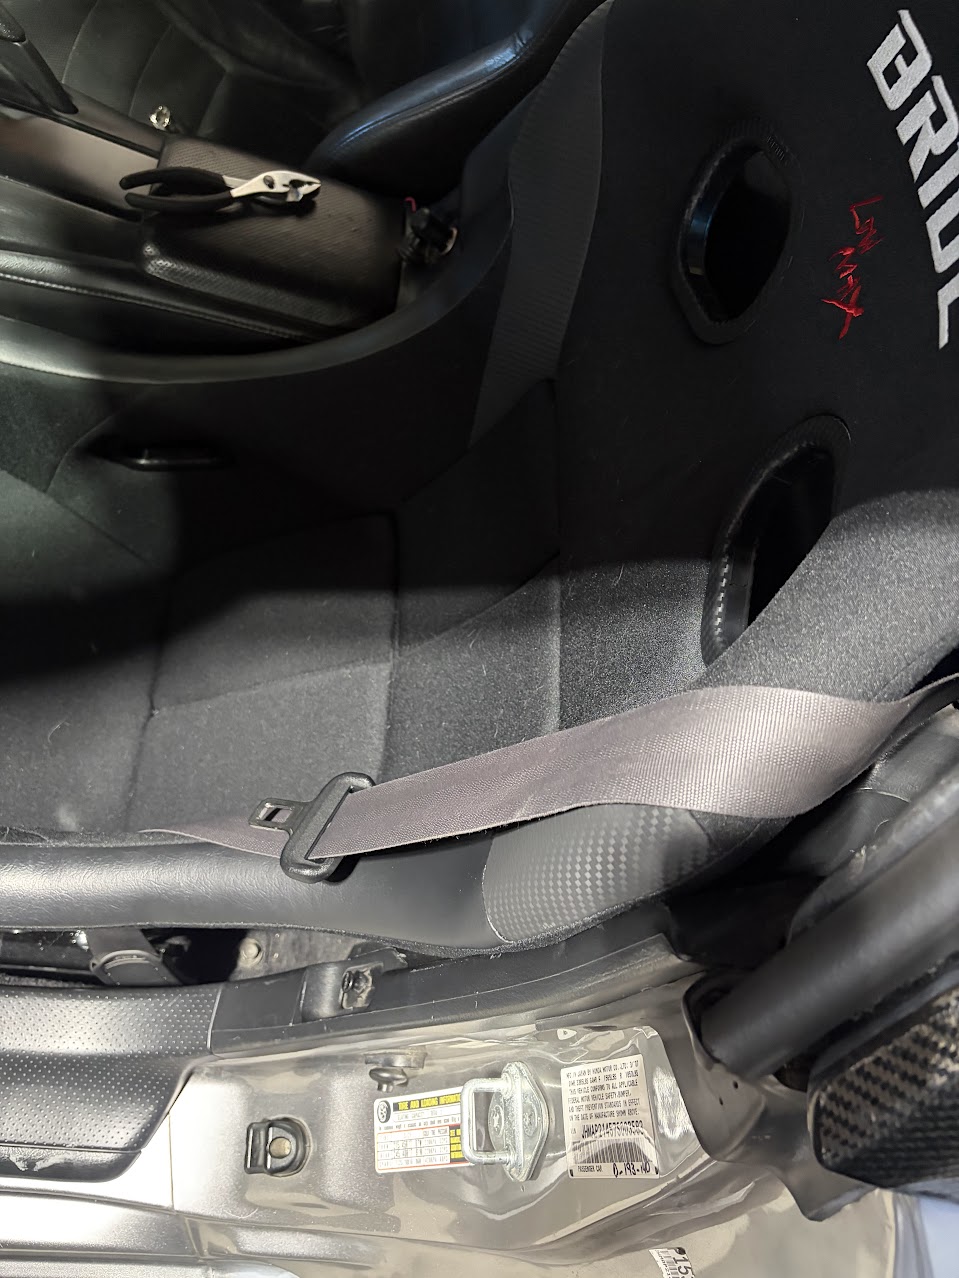
- I plan to get an EVS roll bar soon, so I will install the harness at that time. However, for now I am just running the standard 3-point seat belt. The seat belt bracket on the PCI rails will NOT work with the stock seat belt buckle and some modification is necessary. As seen in the diagram below, the stock seat belt buck bracket is bent is problematic because (1) the seat belt buckle holes wont line up with the PCI rail bracket, (2) due to the angle, it would be pushing into the seat or the side of the trans tunnel. What you will need to do is cut off the bent part and drill/widen the existing hole just underneath the buckle. To cut off and drill, I used a non-name angle grinder w/ DeWalt cutting wheel and DeWalt drill bit. All were bought and returned to Lowes with no problems. The end result is shown in the picture below and is IMO good because (1) it is just beneath the buckle hole, (2) buckle harness is in a good position and can be fished through the slider rail.
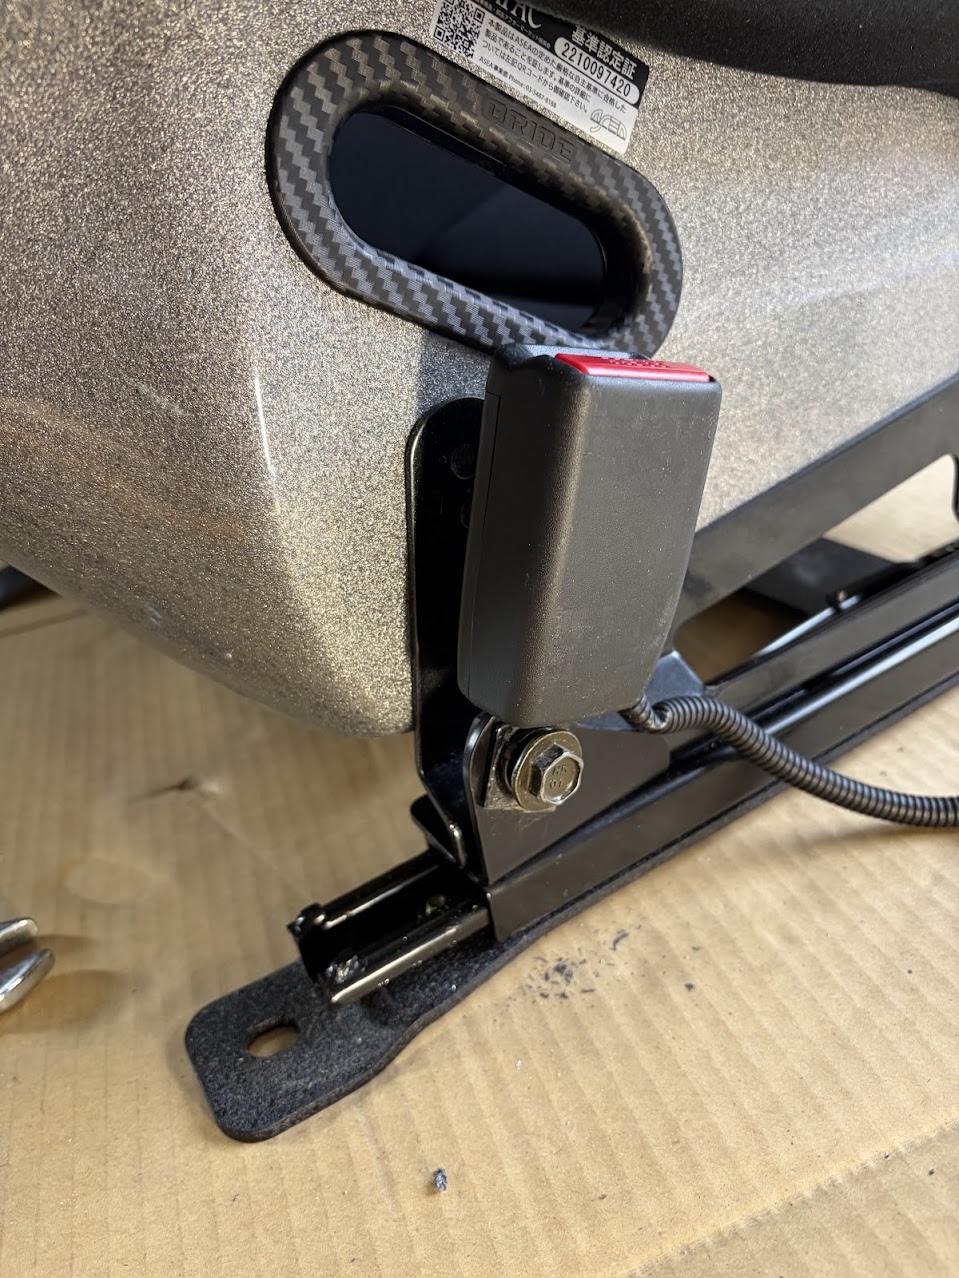
- If you decide to go this route with the buckle, I recommend also fishing the seat belt through the otherside so that the lap belt is even. The process is simple. With the seat removed, unbolt the seat belt base, take apart the bolt and washers (make sure to remember the order), fish it through the left side of the Bride seat, put back on the washers in the correct order, and re-torque. It will help if lift the rear of the seat/rails with some woodblocks to get room to tighten/torque. With this setup, the seat belt feels comfortable and safe. I am 5'10" 175lbs to give reference.
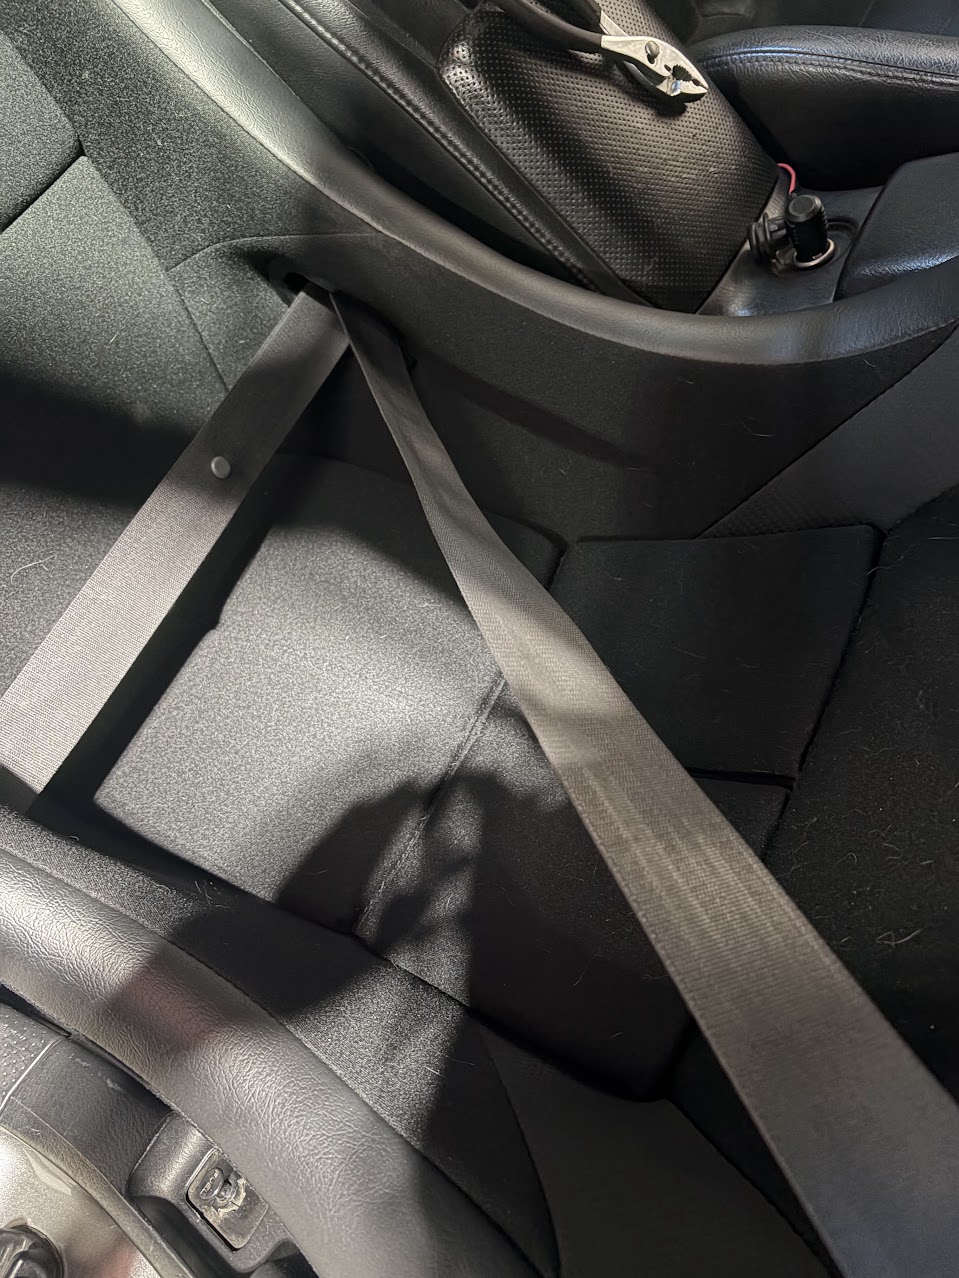
- When you remove the old seat on an AP2, there will be another sensor that you need to remove. I believe it is a slider position sensor to detect if you are too close for airbag deployment. This is secured on the old seat with some Torx (iirc T30) bolts and plastic clips. Once removed, you can plug it into the harness in the car (under the seat) and leave it sitting. This will get rid of the SRS light.
Testing and Thoughts#
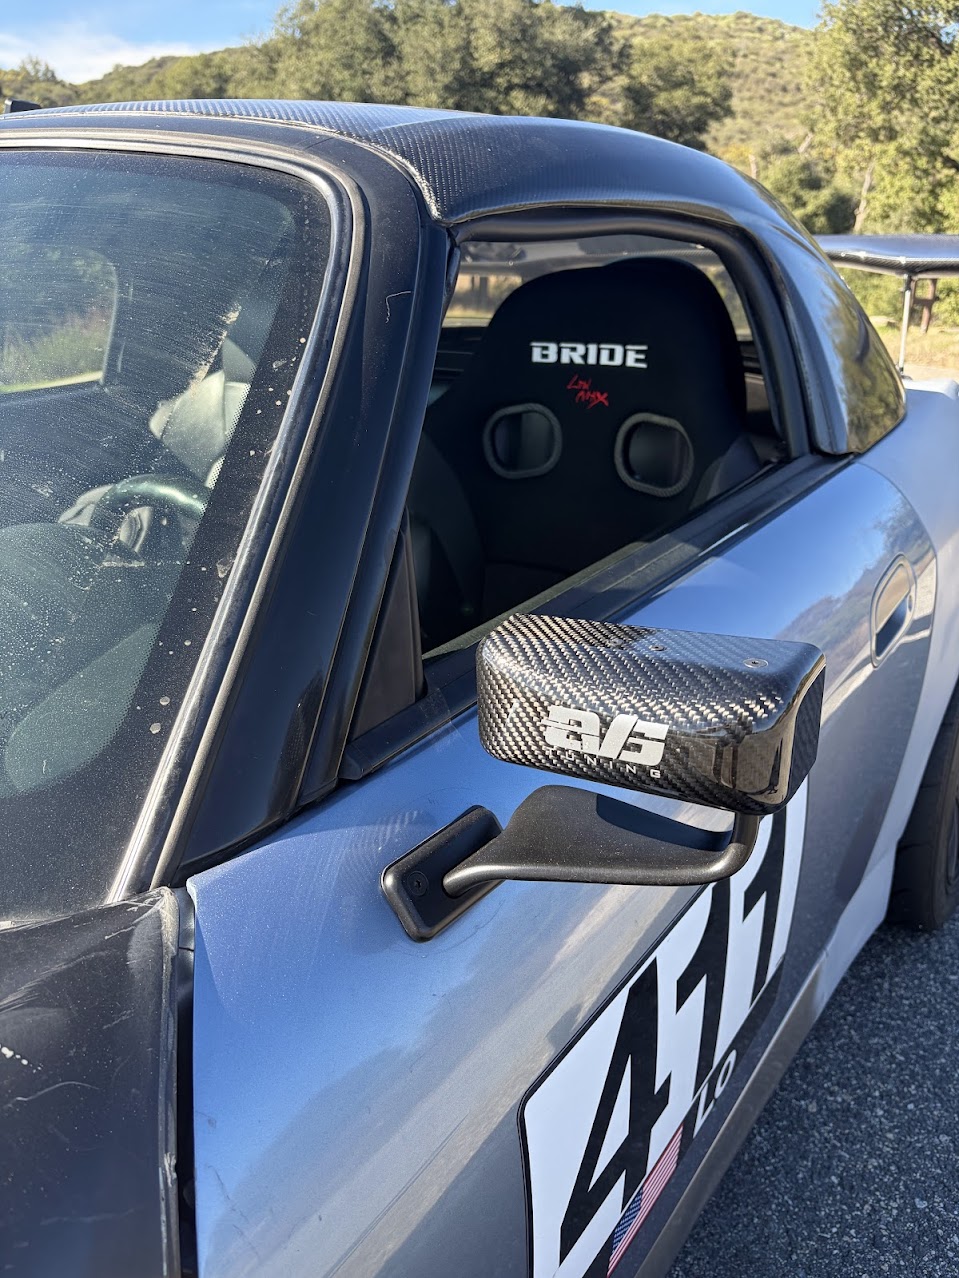
I took the car to Palomar Mt. for some pictures and a dry-run. My impressions:
- The seat is comfortable while still holding me well and I can heal toe a lot easier as I’m no longer sliding around.
- Due to the wider seat, I don’t feel pinched in longer drives and it is comfortable.
- On longer drives (1.5hr+), it doesn’t feel like there’s a ton of lumbar support and can get slightly uncomfortable.
- I am lower than stock seat height which puts me below the factory roll hoops. The seat can go lower on the rails. I am currently about 2/3rds up on the front and 2/5s up on the rear.
- With the seat belt setup, I do need to fish the head of the belt through first, then buckle. I have room on the right side to grab it from the other side.
- Unbuckling is simpler, I can just unbuckle and pull on the belt to get the head out off the buckle and hole.
- I can unbuckle and egress in ~3s in case of fire.